The Dining Area Profile contains the settings for a dining area in the restaurant. This includes the dining table setup with layouts and settings for the table button appearance.
You assign a dining area profile to a hospitality type that manages dining tables.
The dining area profile is set up depending on which layout view (graphical or grid) it is used for, whether guests are requested and whether seating capacity is in use.
Setting up Dining Area Profiles
- Go to LS Hospitality > Point of Sales > POS > Dining Area Profiles.
- Insert a new dining area profile with an ID and description.
- You can apply a template by selecting Apply Template on the action banner.
- Refer to the field help for Dining Area Profile for more information.
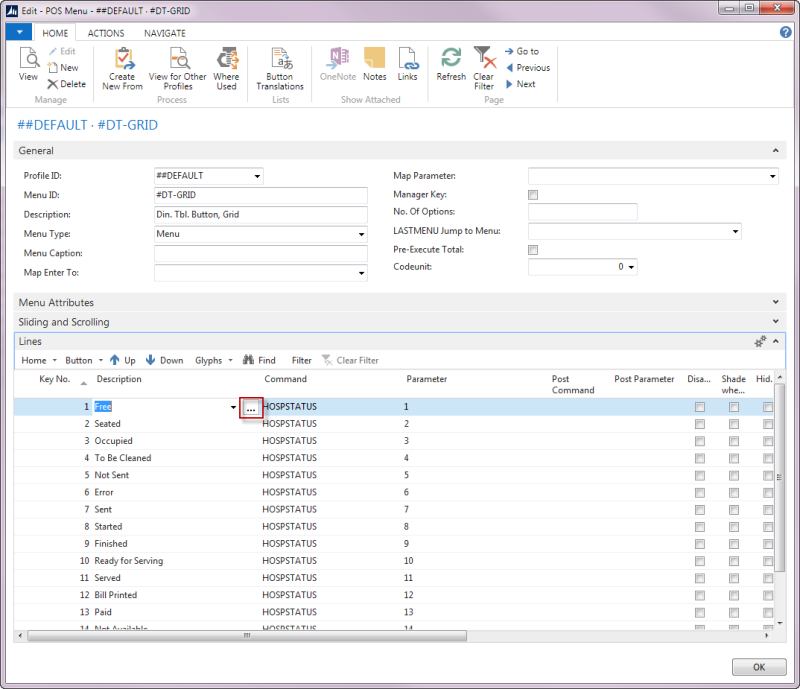
Adjusting or Changing the Dining Table Button Menu
- Click the AssistButton next to the Dining Table Button Menu ID field.
- Select to Edit the menu.
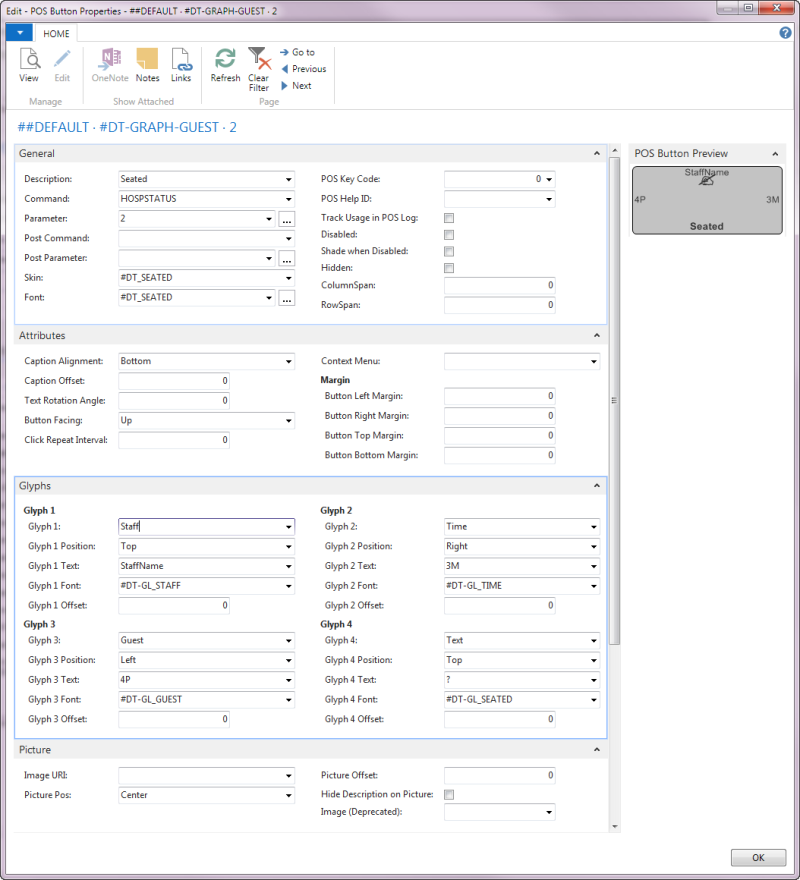
- On a menu line you want to change, click Button, Properties or click the AssistButton in the Description field.
You can adjust the caption alignment and offset and select different skin and font.
SettingGlyphs
On the GlyphsFastTab, there are four glyphs you can edit.
In the Glyph 1 field, you can select the following:
- Text – for symbol (you can use a symbol font)
- Staff – Staff name or staff ID (controlled by Dining Table Staff Descr. Field in the profile)
- Guest – number of guests or seating capacity
- Time – time (controlled by Seating Time Info and Serving Time Info in the profile)
- Amount – Total amount of the order
- Rest. Menu Type – The restaurant menu type of the active KOT
You can adjust the position of Glyph 1, the font and offset.
The text in the Glyph 1 Text field only appears when Glyph 1 is text. The program replaces any text in this field for other options (staff, guest, time, amount and rest. menu type).
The same applies to the other glyphs.
Setting a Picture
You can set a picture on the button.
- Click the Lookup button in the Image URI field and select an image from the Retail Image List.
- Select a position for the image in the Picture POS field.
- You can set an offset in the Picture Offset field.
Sharing the Same Dining Area Profile
Two or more hospitality types can share the same dining area profile. The same dining tables are opened up when these hospitality types are selected. Each dining table has item entries registered to all these hospitality types. The transaction on a dining table is registered to the starting hospitality type. The items of the transaction are registered to the hospitality type where the dining table was opened.
The following applies to hospitality types sharing the same dining area profile:
- The types must have the same service flow.
- The types have the same Sharing Sales Type Filter. This filter is used by the system to filter on orders registered to all the sales types when listing orders for the hospitality type selected.
Note: The system constructs this filter automatically when validating the dining area profile for the hospitality type.