The dining area layout contains dining tables with their coordinates, size, and information on availability. The layout can have a background image. You can copy one layout to another.
Note: The dining table layouts within a dining area contain the same set of dining tables. If you want to have fewer tables in one layout, you can mark these tables in the Availability field as Not Available or even Not in Use. If they are not in use they will not appear on the graphical layout or on the dining table button grid. They do, however, appear on the dining table list as Not Available and also in the Allocation panel.
To create a dining area layout
- Go to LS Hospitality - Point of Sales - POS - Administration - Dining Areas and edit the desired dining area.
- Click Layouts on the Home action menu (the Dining Area section).
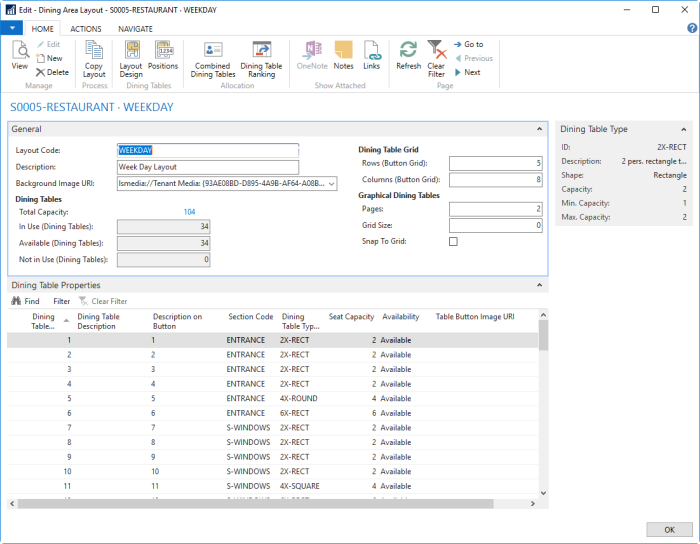
- Click New to insert a new layout with a Layout Code and a description. The program inserts all the dining tables registered for the dining area in the Dining Table Properties FastTab.
- If you want to change the description of the dining tables, enter the description in the Dining Table Description field. The system automatically updates the Description on Button field according to the option selected in the Dining Table ID field for the dining area.
- In the Section Code field you can change the default section.
-
In the Availability field you can select Not Available or Not in Use as appropriate. You can also set this property on the POS Client when designing the layout.
To set default coordinates for graphical layout
- On the Dining Area Layout page, click Positions on the Home action menu, if the layout is a graphical layout.
- Click Set Default Coordinates for All on the action menu, if you are using a graphical layout. Default coordinates make it much easier to design the layout in the Hospitality POS client.
See Also
Example: Copying and Designing a Dining Area Layout