Product Groups
It is important to have a well defined Product Group structure, before you start to set up Product Groups. Before setting up Product Groups you should define how detailed the Product Group structure should be in order to serve best the needs of your business. Then you create Product Groups and assign closely related retail items to the same Product Group. This is especially true for retail items that have variants.
To set up Product Groups
- Click LS Retail – Back Office, Setup, Item, Groups, Product Groups.
- Press F3 to enter a new Product Group.
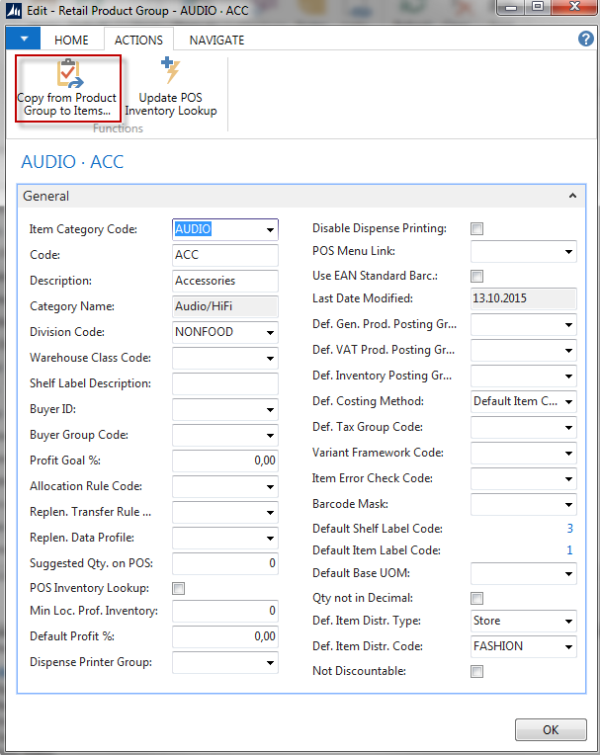
- Fill in the Code and Description fields.
- In the Item Category field, click the AssistButton to see the Item Categories window. Select the relevant Item Category, and then click OK to copy it to the field.
- Fill in the remaining fields as appropriate.
Repeat steps 2 to 5 for each Product Group you want to create.
When you select a Product Group for a retail item, the Item Category, the posting groups, the section and shelf location, the bar code mask and variant groups of the Product Group will all be automatically assigned to the item. When you make changes to these features after you have assigned items to the group, you can use a function to copy these features specifically to the items.
To copy from Product Groups to Retail Items
- Click LS Retail – Back Office, Setup, Item, Product Groups, Edit button. The Retail Product Group Card window appears.
-
Browse to the relevant Product Group, and on the Actions menu click Copy from Product Group to Items.
- On the Options FastTab, select the check boxes for the settings you want to copy from the Product Group to its items.
-
Click OK to run the function. The program will copy the requested information to the retail items in the group.
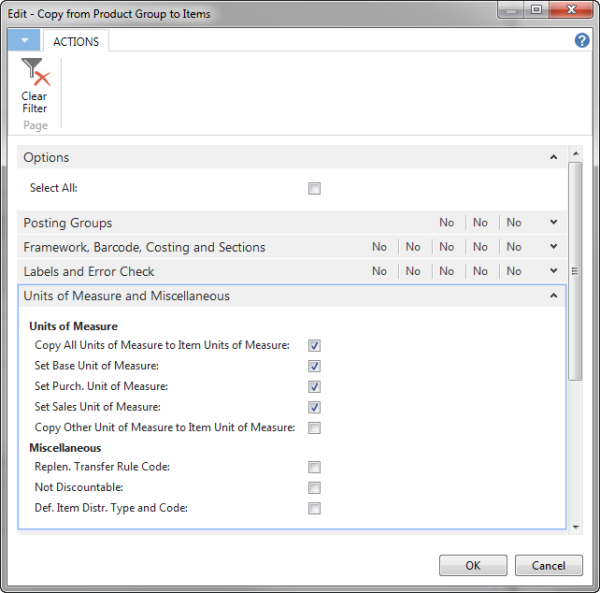
Note: Before copying information from Product Groups to retail items, the relevant retail items must already have been assigned to the Product Groups. If Base Unit of Measure is changed then Purchase and Sales Units are also changed by default.