When using the InStore worksheets for inventory management the user can edit the Expiry worksheet. The user must set the Expires before Date to select which items will be pulled into the worksheet, along with lot number details.
When the items have been selected into the worksheet, the process is executed by clicking OK. The worksheet is then populated based on the information in the stock transactions. Lot numbers and Expiry Dates are populated in the worksheet journal.
To edit a worksheet
- Go to Departments - LS Retail - InStore Management - Worksheets
- Click All Types from the content area
- Select the correct worksheet and click Edit Worksheet from the Home action
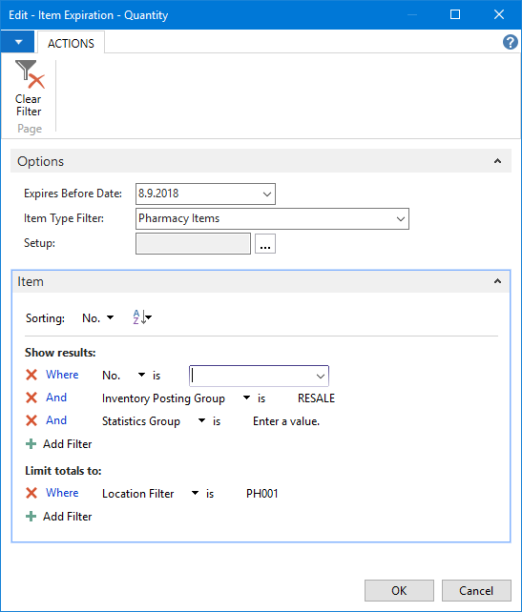
- Fill in the fields in the Options FastTab in the Item Expiration table as described in the following table:
| Field | Description |
|---|---|
| Expires Before Date | Here you defined the date you want to see the items that are expiring |
| Item Type Filter | Here you select what type of items should be populated, for example: Pharmacy Items |
| Setup | Here is extra setup for the Expiry Inventory Handling, see How to: Set Up Expiry Inventory Handling |
- Fill in the fields in the Item FastTab in the Item Expiration Table as described in the following table:
| Field | Description |
|---|---|
| No. | Here you define the worksheet down to an item if needed |
| Inventory Posting Group | Here you select the Inventory Posting Group if needed, for example: RESALE |
| Statistics Group | |
| Location Filter | Here you select the location for the worksheet, the store number |
Here is an example of how the Item Expiration could be filled out:
- After confirmation, the Purch. Return - Expired Lot No. - Return To Vendor page opens. Scan all the items:
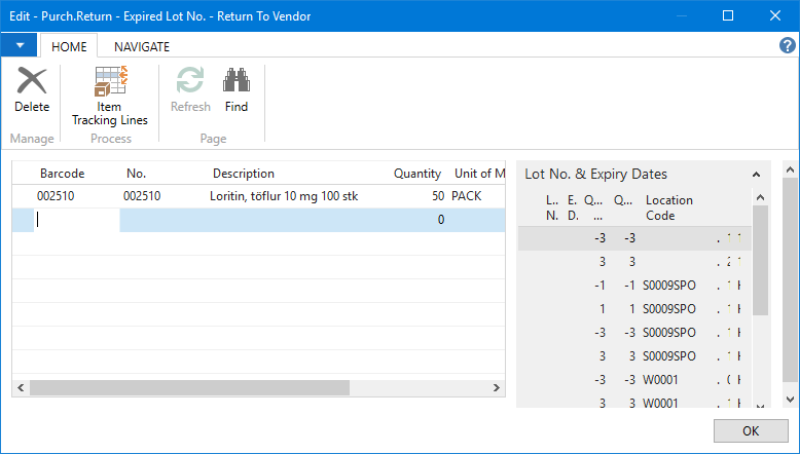
- After scanning the items, click Ok
- Click Accept and then Post from the Home action,
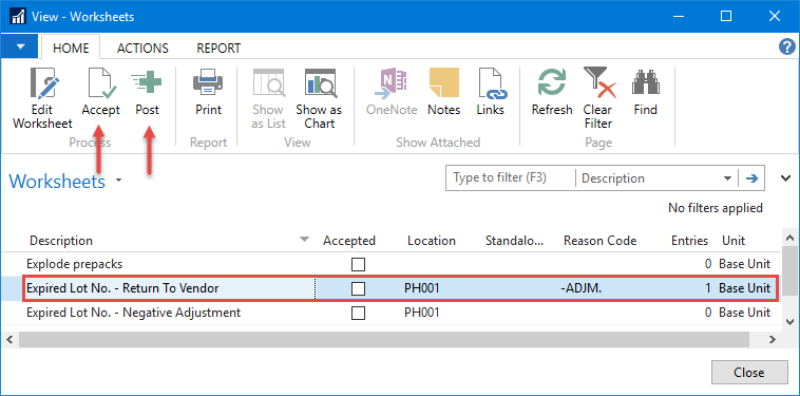
After the worksheet has been accepted, a check mark will be place in the Accepted field in the worksheet table.
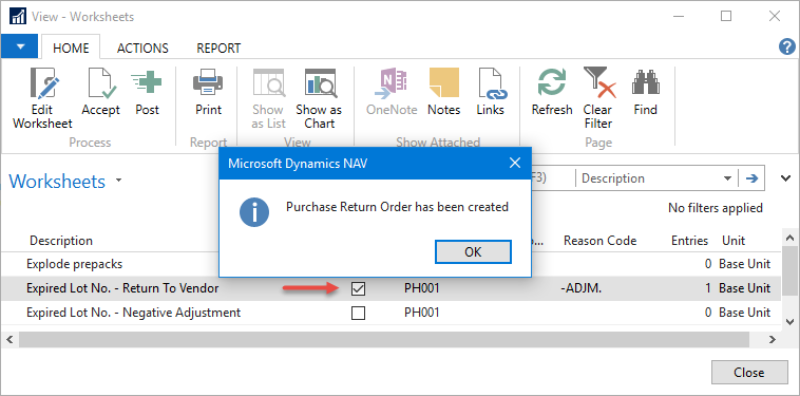
After posting, a Purchase Return Order has been created: