- In a web browser, enter your organization's Azure portal (portal.azure.com) by logging in as the admin user for your LS Central SaaS tenant. The login address should be formulated as: admin@<tenantname>.onmicrosoft.com. In the following example we will use admin@DEVUKLSInsightTeam.onmicrosoft.com
- In Azure services, click Azure Active Directory.
- In the Manage section of the left navigation bar, click App registrations.
- Create the application in Azure (click New registration).
- Insert a name for your app (for example LS Central).
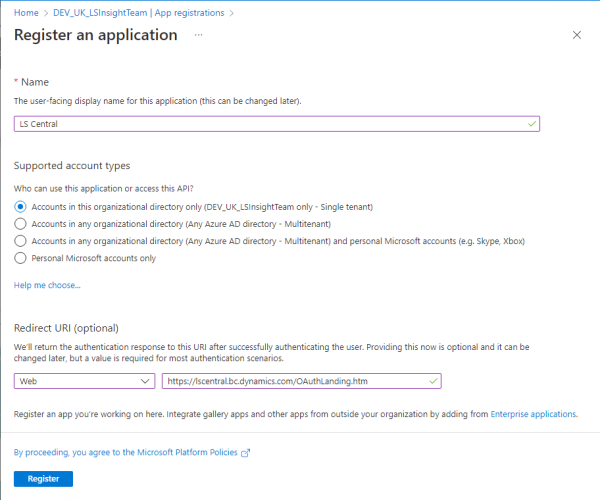
- Select Accounts in this organizational directory only (<tenantname> only - Single tenant)
Note: Selecting multi-tenant or personal accounts will not work.
- In the Redirect URI section, select Web, and then enter this URL: https://lscentral.bc.dynamics.com/OAuthLanding.htm
Note: This property is case-sensitive.
- Click Register to create the application.
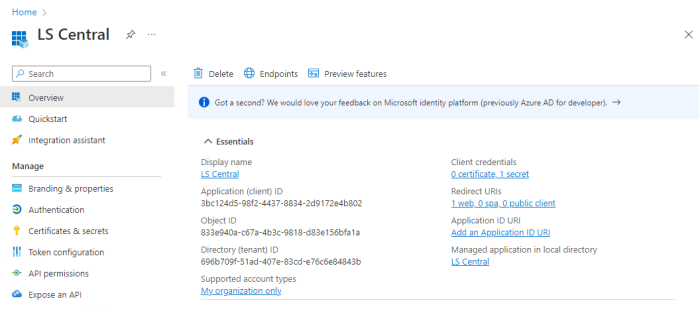
Tip: Copy the Application (client) ID from the overview screen to a text file. You will need this later when you register the application in LS Central and when you call the APIs.
Tip: From the overview screen you can also copy the tenant Directory (Tenant) ID for later use.
- Set the API permissions that the external application needs:
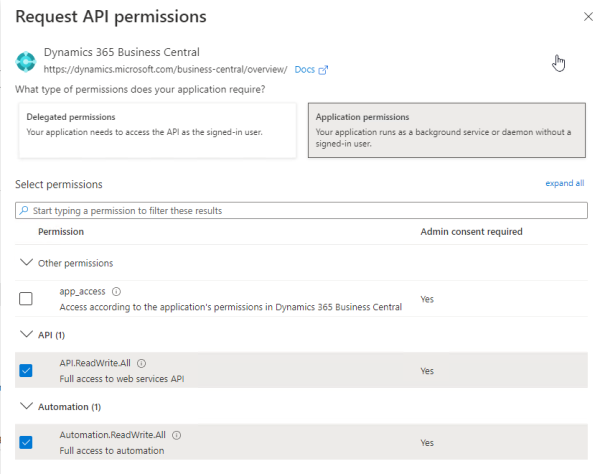
- Click API permissions in the left navigation menu, and then click Add a permission.
- From the list of commonly used Microsoft APIs, select Dynamics 365 Business Central. Since the app is going to have its own account in LS Central, you must select Application permissions. This is for applications that run as background service without a signed-in user.
- In the Request API permissions page, click the Application permissions button.
- There are three permissions available:
- app_access - Can be ignored, is not accepted by LS Central.
- API.ReadWrite.All - Gives full access to all LS Central APIs, including the automation APIs.
- Automation.ReadWrite.All - Gives full access to only the automation APIs. This is useful for applications that will manage the environment, install extensions, and so on.
In the Status column on the previous API Permissions page, you can see that the newly added permission has not been granted for the current organization.

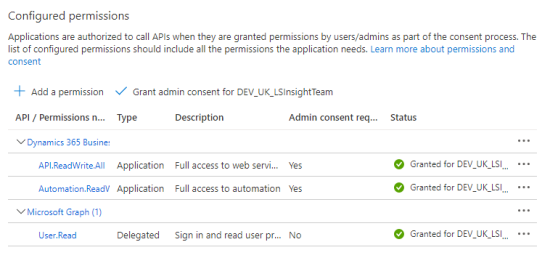
Next, click the Grant admin consent action.
- The last step in registering the app in Azure is to create a secret.
Click Certificates & secrets in the left navigation menu, and then click the New client secret action.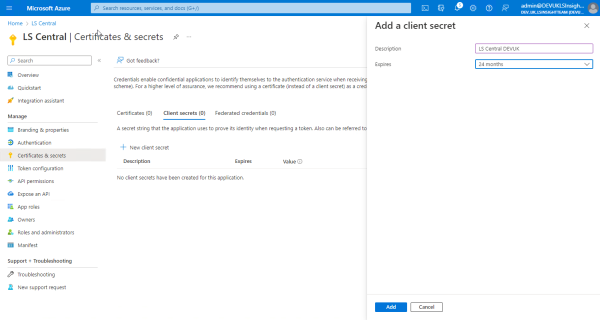
- In the Add a client secret page, select an expiration period in the Expires field, and click Add.
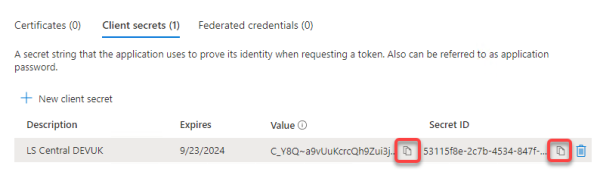
Tip: Do not forget to copy the created secret Value, because this is the only time you will see it.Note: You cannot set an unlimited expiration period. The longest period is 24 months. This means that you must update the secret occasionally.
You have now completed the first step to register the application in Azure. The next step is to create the application account in LS Central.